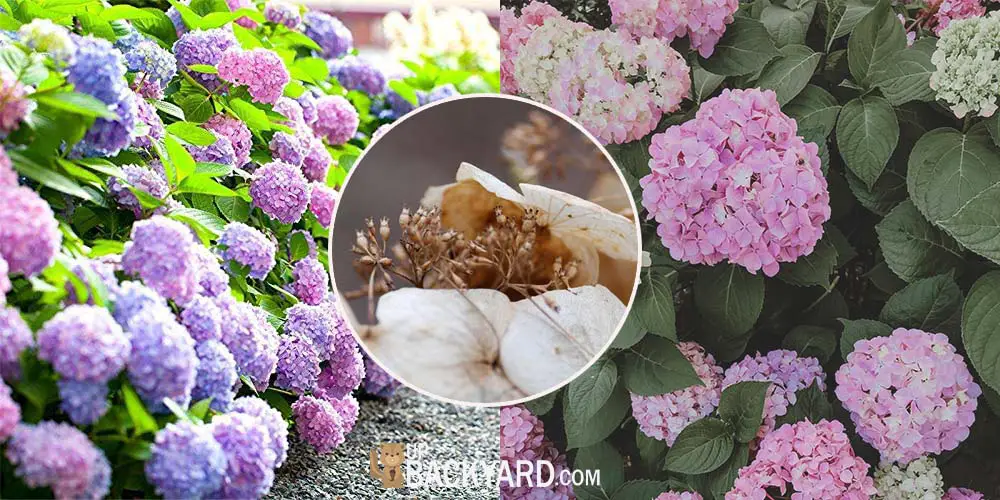
There is nothing quite like a hydrangea. These shrubs are low maintenance and produce beautiful soft clusters of flowers all season long.
Whether you plant a few bushes throughout your cottage-style garden or grow them as a statement hedge, it is easy to see why these shrubs are a long-time favorite of experienced and novice gardeners alike.
While you can find hydrangeas in almost every garden center, growing them from seed is not common.
Garden centers and nurseries swim with beautiful balls of flowers in blue, purple, white, or pink making it easy to know what you are getting. These shrubs are ready to be planted into your garden straight away.
Another way to have instant hydrangeas is to take a cutting of a mother plant. Hydrangeas are easily propagated and rooted by taking a small piece of the mother plant, adding some rooting hormone, and sticking it in water.
After a few weeks, the cutting will produce roots and you can transfer to a pot of soil.
If you are hoping to grow your own hydrangea without going to the nursery or propagating one from a neighbor, you can also grow them from seeds.
How To Plant Hydrangea Seeds
Growing hydrangea shrubs from seed can take a long time. In fact, it will take about 14 months from planting the seed until you have a mature enough plant to put into the ground.
However, growing these beautiful flowering shrubs from seed creates unique and one-of-a-kind hydrangeas.
So if you are up for the task and have the patience, read on to learn everything you need to know about growing hydrangeas from seeds.
Harvesting Your Hydrangea Seeds
The first step to growing hydrangea from seeds is to gather the necessary supplies. You will need a clean, fresh, garden or potting soil, a pot, and some hydrangea seeds.
While you can source hydrangea seeds online, seed stores, and at most garden centers, you can also harvest your own from a hydrangea plant.
Hydrangea flower clusters are full of tiny flowers, but only some of these flowers are fertile. You will need fertile flowers to produce seeds.
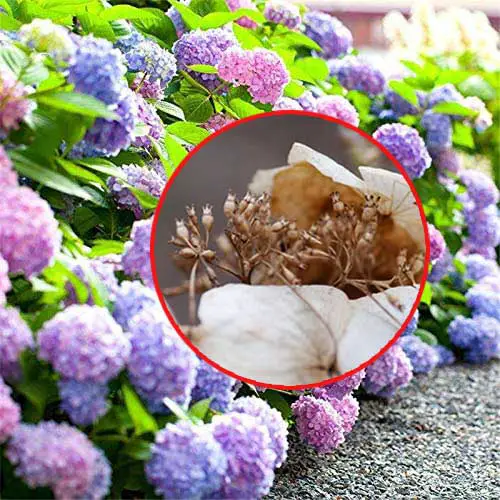
It is important to keep in mind that hydrangea seeds are incredibly small and can be mistaken for dust. So even when you have found them, it can be easy to mislabel or lose them.
There are certain times when the seeds are ready to be harvested. Wait until the blooms begin to fade, then place a paper bag over the bloom. Cut the stem and allow the flower to continue to fade with the bag over it.
After a few days, you can shake the flower cutting and the seeds will fall out of the fertile flowers.
Dump the contents onto a large clean surface where you can separate the blooms from the seeds. The seeds are incredibly tiny, using a magnifying glass can help.
You can sow these seeds immediately or store them for next season.
If you want to store them, place them in a dry paper towel inside a plastic sandwich bag and seal it well.
Write the date and the type of seed on the bag for future reference and store in a cool dry place.
Planting the Seeds
Autumn is considered the best time to start the journey of growing your hydrangeas from seeds. This is because the weather around autumn is tepid and well-balanced compared to the high intensity of summer or winter.
Be sure to grow your hydrangeas indoors. Whether it is in your home or in a greenhouse, young hydrangeas will need to be kept out of the elements until they have reached a more mature age and size.
Once you have your seeds, you can begin planting them. You will want to use a small pot, either a 4-inch garden pot or a seed starter tray.
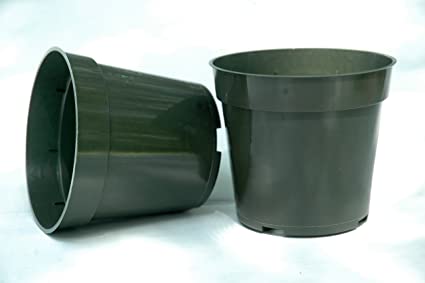
Using either of these will allow you to set your seeds up for success. If you are going to be starting multiple seeds, a seed starting tray is a great option.
The only downside to using a seed starting tray is that you will need to transplant your seedlings into a garden pot when they outgrow the tray and they will do that very quickly.
Now that your garden pot or seed starting tray is set up, it is time to plant your seeds.
Unlike traditional seeds that need to be planted under the soil, hydrangea seeds grow when planted on top of the soil. Since the seeds are so small, placing them underneath the soil can decrease the chances of them germinating.
Once you have placed the seeds on top of the fresh garden soil, water your seedlings until the soil is moist. Then place in a cool place and allow the seeds to germinate.
Keep the soil moist, but not overly wet. Soil that is too wet can drown the seeds.
The hydrangea seeds should germinate in about 14 days.
Transfer the Seedlings
After a few months, the small plants can be transplanted into larger containers as they grow.
Do not move the plants into containers that are too large too quickly. It is recommended to size up a pot by one inch when the root systems are poking out the bottom of the drainage holes.
After about 14 months of growing, the hydrangeas should be ready to go into the ground.
It is best to plant your hydrangeas outdoors in early spring or at the end of summer when the hottest days are over.
Hardening Your Hydrangeas
Before you can plant them into the soil outdoors, you have to harden your plants. Hardening is the process of helping your indoor plants adjust to the outdoor environment.
Once the last frost of the spring has happened and the weather is beginning to warm up, begin bringing your hydrangea plant outdoors. Begin with just an hour or two outdoors out of direct sunlight.
Slowly increase the time spent outdoors until the plants are outdoors most of the day and have experienced and adapted to the hot afternoons.
Once they have adjusted, you can plant the hydrangeas in the ground.
Be sure to water your hydrangeas well for the first few weeks until the plants are established.
Caring For Your Hydrangeas
Hydrangeas do not like soggy soil. They thrive in well-draining soil with 4-6 hours of sunlight a day. If you have partial sun, hydrangeas tend to prefer morning sun with afternoon shade.
Be sure to water your hydrangeas weekly. They like deep watering every 6-8 days. It is best to leave the hose on the bottom of the hydrangea plant and not water the foliage or flowers.
Watering from above and getting the flowers or leaves wet can lead to a variety of problems.
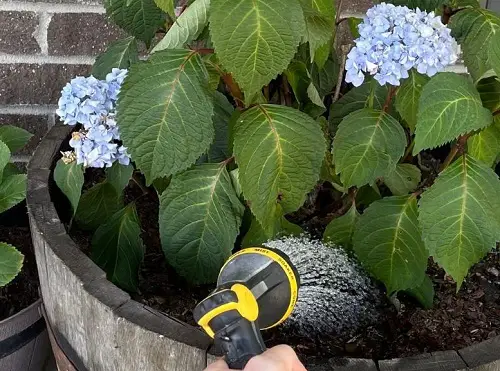
The leaves and flowers can easily burn in the sun and leaving water droplets on them can increase these chances. It can also lead to mildew or attract pests.
Placing mulch around the base of the plant can help keep the moisture in the soil around the hydrangea and prevent it from getting thirsty.
During the hotter months of the year, water more frequently, especially if the leaves or flowers are looking droopy.
Most hydrangeas do not need to be cut back in the winter. In fact, many hydrangea varieties will grow back on old stems as well as produce new ones in the spring.
You might also like: When Is The Best Time To Fertilize Arborvitae? – (Best Season & Signs)
10 Tips For Growing Hydrangea Seeds
- Picking up seeds from an online garden center or a specialty nursery is a great way to gather your seeds.
- Harvesting seeds from your own hydrangea plant or from a cutting is also possible but requires much more work.
- Place the seeds on top of the soil when you sow them. Placing them under the soil can prevent them from germinating.
- Keep the soil moist in your seed starting tray or garden pot where the seeds have been planted.
- Transfer the plants to larger garden pots by increasing by one inch at a time until it is time to plant the hydrangea in the garden.
- Be sure that your pots have adequate drainage holes to prevent root rot.
- Harden your hydrangeas before you move them outside permanently.
- Water your hydrangeas frequently until they are established (roughly 2 weeks after they were planted outdoors).
- Water the plants deeply and infrequently to help establish deep root systems.
- You do not need to cut back the woody stems from hydrangeas in the winter as new greenery will grow on old stems.
Final Thoughts
Hydrangeas provide beautiful and lush flower clusters all season long. Since they come in a variety of colors, they can be added to almost any gardenscape.
Not only are they beautiful to look at, they are easy to care for, making them a favorite for both novice and experienced gardeners alike.
Most people like to buy their hydrangeas already ready to go into the garden from nurseries or garden centers. However, some people like the idea of growing hydrangeas from seed.
You can harvest seeds yourself from a hydrangea plant or buy them online or at nurseries. It is best to start seeds in autumn when the weather is more timid than the hot summers.
Plant your seed on top of fresh soil in a seed starter tray or a 4-inch garden pot. Then water well. The seeds will begin germinating and sprouting within 14 days.
Keep your hydrangea plants indoors until they are about 14 months old. At this point, they are ready to be transplanted into your garden.
Care for your hydrangea plants by watering them deep and infrequently once established. This will help your plant achieve a deep root system and allow the soil to drain. Hydrangeas hate soggy soil.
While it may seem like a long process, growing your own hydrangeas from seeds can be incredibly rewarding.
Seeing your garden grow with plants that you grew yourself provides a sense of accomplishment that buying plants cannot induce.
